Setting Up the Kernel Runtime Environment
QEMU is an open-source virtual machine software that supports emulation of multiple different architectures as well as virtualization of the current architecture in conjunction with KVM. It is currently the most popular open-source virtual machine software.
This section mainly introduces how to use QEMU to set up a debugging and analysis environment. To use QEMU to boot and debug a kernel, we need a kernel, QEMU, and a file system.
Obtaining the Kernel Image File
We have already described how to compile the kernel from source and obtain the kernel image file in the previous section, so we won't repeat it here.
Obtaining QEMU
QEMU can be obtained in two ways: installing from distribution repositories or compiling from source. You can choose based on your needs.
Building a Basic File System with BusyBox
BusyBox is a software that integrates over three hundred of the most commonly used Linux commands and tools, including common commands such as ls, cat, and echo. Compared to GNU core utilities commonly used in major distributions, BusyBox is more lightweight and easier to configure, so we will use BusyBox to provide a basic user environment for our kernel.
Downloading and Compiling BusyBox
Note that when using a newer kernel version on the host, BusyBox may fail to compile. This bug was reported as early as January 2024, but has not been fixed to date.
If your BusyBox compilation fails, consider switching to an older kernel to continue, or choose to download a pre-compiled version directly.
Downloading BusyBox Source Code
First, download the desired version from busybox.net. Here we choose version 1.36.0:
$ wget https://busybox.net/downloads/busybox-1.36.0.tar.bz2
After completion, extract it:
$ tar -jxvf busybox-1.36.0.tar.bz2
Compiling BusyBox
Next, configure the compilation options. Enter the source root directory and run the following command to enter the graphical configuration interface:
$ make menuconfig
Check Settings ---> Build static binary file (no shared lib) to build a statically compiled version that does not depend on libc, since our simple kernel environment only has BusyBox and no additional runtime support like libc.
Optional: In Linux System Utilities, uncheck Support mounting NFS file systems on Linux < 2.6.23 (NEW); in Networking Utilities, uncheck inetd.
Then compile:
$ make -j$(nproc)
$ make install
After compilation, an _install directory will be generated. We will use it to build our file system.
Configuring the File System
First, create the basic file system structure in the _install directory:
$ cd _install
$ mkdir -pv {bin,sbin,etc,proc,sys,dev,home/ctf,root,tmp,lib64,lib/x86_64-linux-gnu,usr/{bin,sbin}}
$ touch etc/inittab
$ mkdir etc/init.d
$ touch etc/init.d/rcS
$ chmod +x ./etc/init.d/rcS
Write the following content to ./etc/inittab:
::sysinit:/etc/init.d/rcS
::askfirst:/bin/login
::ctrlaltdel:/sbin/reboot
::shutdown:/sbin/swapoff -a
::shutdown:/bin/umount -a -r
::restart:/sbin/init
The above file specifies the system initialization script as etc/init.d/rcS. Next, we configure this file with the following content, which mainly mounts various file systems, sets directory permissions, and creates an unprivileged user:
#!/bin/sh
chown -R root:root /
chmod 700 /root
chown -R ctf:ctf /home/ctf

mount -t proc none /proc
mount -t sysfs none /sys
mount -t tmpfs tmpfs /tmp
mkdir /dev/pts
mount -t devpts devpts /dev/pts

echo 1 > /proc/sys/kernel/dmesg_restrict
echo 1 > /proc/sys/kernel/kptr_restrict

echo -e "\nBoot took $(cut -d' ' -f1 /proc/uptime) seconds\n"

cd /home/ctf
su ctf -c sh

poweroff -d 0  -f
Then add executable permissions to this script, which is typically used as our custom environment initialization script:
$ chmod +x ./etc/init.d/rcS
Next, we configure user group related permissions. Here we create two user groups root and ctf, two users root and ctf, and configure a file system mount entry:
$ echo "root:x:0:0:root:/root:/bin/sh" > etc/passwd
$ echo "ctf:x:1000:1000:ctf:/home/ctf:/bin/sh" >> etc/passwd
$ echo "root:x:0:" > etc/group
$ echo "ctf:x:1000:" >> etc/group
$ echo "none /dev/pts devpts gid=5,mode=620 0 0" > etc/fstab
Packaging the File System
This section describes how to package the file system. Three different formats are provided: qcow2, ext4, and cpio.
QCOW2 Format
QEMU Copy-on-Write version 2 QCOW2 is a commonly used disk image format for QEMU. We can create a QCOW2 image file of a specified size with the following command:
$ qemu-img create -f qcow2 rootfs.qcow2 8M
Then we can mount it as a network block device with the following command:
Before this, you may need to manually enable the following kernel module:
$ sudo modprobe nbd
$ sudo qemu-nbd -c /dev/nbd0 ./rootfs.qcow2
Then format it to the desired file system, such as the most commonly used ext4:
$ sudo mkfs.ext4 /dev/nbd0
Then perform a standard mount:
$ sudo mount /dev/nbd0 /mnt
Then copy the file system contents we built earlier into it:
$ sudo cp -auv _install/* /mnt
$ sudo chown -R root:root /mnt/
$ sudo chmod 700 /mnt/root
$ sudo chown -R 1000:1000 /mnt/home/ctf/
Finally, unmount and unbind nbd as usual:
$ sudo umount /mnt
$ sync
$ sudo qemu-nbd -d /dev/nbd0
ext4 Image Format
You can also package the file system as an ext4 image format. First, create a blank ext4 image file, where bs indicates block size and count indicates the number of blocks:
$ dd if=/dev/zero of=rootfs.img bs=1M count=32
Then format it as ext4:
$ mkfs.ext4 rootfs.img
Mount the image and copy the files into it:
$ mkdir tmp
$ sudo mount rootfs.img ./tmp/
$ sudo cp -rfp _install/* ./tmp/
$ sudo chown -R root:root ./tmp/
$ sudo chmod 700 ./tmp/root
$ sudo chown -R 1000:1000 ./tmp/home/ctf/
$ sudo umount ./tmp
cpio Format
We can use the following command in the _install directory to package the file system in cpio format:
$ find . | cpio -o --format=newc > ../rootfs.cpio
Or alternatively:
$ find . | cpio -o -H newc > ../rootfs.cpio
The location here is chosen arbitrarily; you can also place it wherever you prefer.
Of course, we can also use the following command to re-extract the file system:
$ cpio -idv < ./rootfs.cpio
Booting the Kernel
Here we use the previously compiled Linux kernel and file system image as an example to introduce how to boot the kernel. We can directly use the following script to boot the Linux kernel:
#!/bin/sh
qemu-system-x86_64 \
    -m 128M \
    -kernel ./bzImage \
    -hda ./rootfs.qcow2 \
    -monitor /dev/null \
    -append "root=/dev/sda rw rdinit=/sbin/init console=ttyS0 oops=panic panic=1 loglevel=3 quiet kaslr" \
    -cpu kvm64,+smep \
    -smp cores=2,threads=1 \
    -nographic \
    -snapshot \
    -s
Parameter descriptions are as follows (for detailed descriptions, refer to the QEMU official documentation):
-m: Virtual machine memory size.-kernel: Kernel image path.-hda: File system path. We mount the qcow2 image as a real hard disk device, with the advantage of being closer to a real environment.-monitor: Redirect the monitor to the host device/dev/null. Redirecting to null here is mainly to prevent people from getting the flag directly through the monitor in CTF.-append: Kernel boot parameter optionsroot=/dev/sda rw: This parameter sets the device where the root file system is located. Since we use-hdato mount it as a SATA hard disk, and the path of the first SATA hard disk in Linux is/dev/sda, we point the root file system path to the device path and grant read-write permissions with therwflag.kaslr: Enable kernel address randomization. You can also change it tonokaslrto disable it for easier debugging.rdinit: Specify the initial boot process. Here we specify/sbin/initas the initial process, which by our earlier configuration defaults to using/etc/init.d/rcSas the startup script.loglevel=3&quiet: Suppress log output.console=ttyS0: Specify the terminal as/dev/ttyS0, so we can enter the terminal interface immediately upon boot.
-cpu: Set CPU options. Here smep protection is enabled.-smp: Set symmetric multiprocessor configuration. Here we set two cores with one thread per core.-nographic: Do not provide a graphical interface. In this case, the kernel only has serial output, which QEMU redirects to our terminal.-snapshot: Boot using snapshots, so modifications to the file system within the virtual machine will not persist to disk.-s: Shorthand for-gdb tcp::1234. We can later connect to the local port via gdb for debugging.
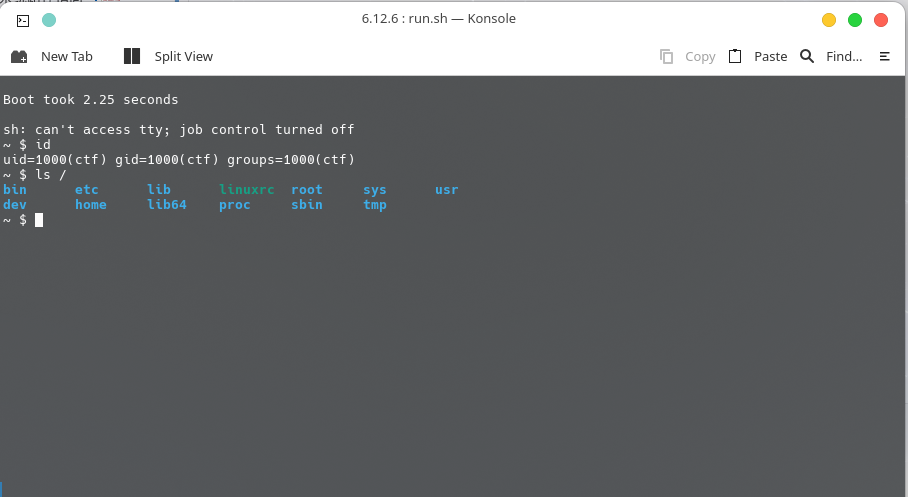
The effect after booting is as follows:
If you are using an ext4 file image, you should modify some boot parameters as follows:
#!/bin/sh
qemu-system-x86_64 \
    -m 128M \
    -kernel ./bzImage \
    -hda  ./rootfs.img \
    -monitor /dev/null \
    -append "root=/dev/sda rw rdinit=/sbin/init console=ttyS0 oops=panic panic=1 loglevel=3 quiet kaslr" \
    -cpu kvm64,+smep \
    -smp cores=2,threads=1 \
    -nographic \
    -snapshot \
    -s
The modified parameters are:
-hda: We changed the file system path from a qcow2 image to an ext4 image.
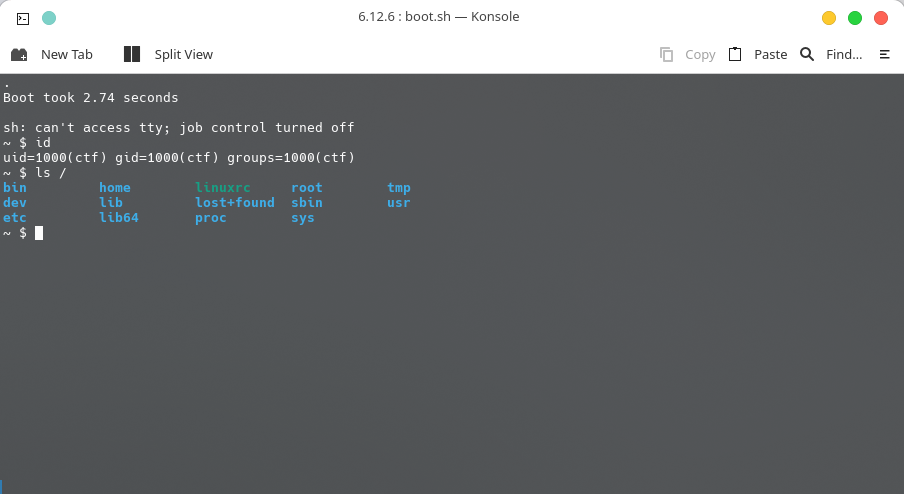
The effect after booting is as follows:
If you are using a cpio file system, you should modify some boot parameters as follows:
#!/bin/sh
qemu-system-x86_64 \
    -m 128M \
    -kernel ./bzImage \
    -initrd  ./rootfs.cpio \
    -monitor /dev/null \
    -append "root=/dev/ram rdinit=/sbin/init console=ttyS0 oops=panic panic=1 loglevel=3 quiet kaslr" \
    -cpu kvm64,+smep \
    -smp cores=2,threads=1 \
    -nographic \
    -snapshot \
    -s
The modified parameters are:
-initrd: Initial file system path. The cpio file system is loaded into memory (initramfs).-append: We changed toroot=/dev/rambecause we are using initramfs, so the file system is in memory, and we need to change the root file system path to the memory device.
Additionally, when the monitor is not set to /dev/null, we can press CTRL + A once, then press C to enter the QEMU monitor. The monitor provides many useful commands.
~ $ QEMU 9.1.2 monitor - type 'help' for more information
(qemu) help
announce_self [interfaces] [id] -- Trigger GARP/RARP announcements
balloon target -- request VM to change its memory allocation (in MB)
block_job_cancel [-f] device -- stop an active background block operation (use -f
                         if you want to abort the operation immediately
                         instead of keep running until data is in sync)
...
Loading Drivers
Now let's load the driver we compiled earlier. We just need to copy the generated ko file to the file system, then add an insmod command in the startup script, as follows:
chown -R root:root /
chmod 700 /root
chown -R ctf:ctf /home/ctf

mount -t proc none /proc
mount -t sysfs none /sys
mount -t tmpfs tmpfs /tmp
mkdir /dev/pts
mount -t devpts devpts /dev/pts

echo 1 > /proc/sys/kernel/dmesg_restrict
echo 1 > /proc/sys/kernel/kptr_restrict

insmod /root/a3kmod.ko

echo -e "\nBoot took $(cut -d' ' -f1 /proc/uptime) seconds\n"

cd /root
su root -c sh

poweroff -d 0  -f
After QEMU boots the kernel, we can use dmesg to view the output and confirm that the corresponding ko was loaded.
# dmesg | grep a3kmod
[    5.689366] a3kmod: loading out-of-tree module taints kernel.
[    5.693217] [a3kmod:] Hello kernel world!
Debugging and Analysis
Here we briefly introduce how to debug the kernel.
Debugging Tips
For easier debugging, we can start the shell as the root user by modifying the corresponding code in the init script:
- su ctf -c sh
+ su root -c sh
Additionally, we can disable kernel randomization at boot time:
#!/bin/sh
qemu-system-x86_64 \
    -m 128M \
    -kernel ./bzImage \
    -hda  ./rootfs.img \
    -monitor /dev/null \
    -append "root=/dev/sda rw rdinit=/sbin/init console=ttyS0 oops=panic panic=1 loglevel=3 quiet nokaslr" \
    -cpu kvm64,+smep \
    -smp cores=2,threads=1 \
    -nographic \
    -s
Basic Operations
We can obtain information about specific kernel symbols through /proc/kallsyms:
# cat /proc/kallsyms | grep prepare_kernel_cred
ffffffffa66d0b90 T __pfx_prepare_kernel_cred
ffffffffa66d0ba0 T prepare_kernel_cred
ffffffffa8061668 r __ksymtab_prepare_kernel_cred
The lsmod command can be used to view basic information about loaded drivers:
# lsmod
a3kmod 16384 0 - Live 0xffffffffc008f000 (O)
By reading the /sys/module directory, we can obtain more detailed kernel module information:
# cat /sys/module/a3kmod/sections/.text
0xffffffffc008f000
# cat /sys/module/a3kmod/sections/.data
0xffffffffc0091038
Starting Debugging
QEMU provides an interface for debugging the kernel. We can add -gdb dev to the boot parameters to start a debug service. The most common operation is to listen for a TCP connection on a port. QEMU also provides a shorthand -s, which means -gdb tcp::1234, i.e., starting a gdbserver on port 1234.
After booting the kernel in debug mode, we can use the following command in another terminal to connect to the corresponding gdbserver and start debugging:
gdb -q -ex "target remote localhost:1234"
After booting the kernel, we can use the add-symbol-file command in gdb to add symbol information, using additional parameters in the format -s section_name section_address to specify the load addresses of each section in memory, for example:
pwndbg> add-symbol-file ./test_kmod/src/a3kmod.ko -s .text 0xffffffffc008f000 -s .data 0xffffffffc0091038 -s .bss 0xffffffffc0091540
add symbol table from file "./test_kmod/src/a3kmod.ko" at
        .text_addr = 0xffffffffc008f000
        .data_addr = 0xffffffffc0091038
        .bss_addr = 0xffffffffc0091540
Reading symbols from ./test_kmod/src/a3kmod.ko...
warning: remote target does not support file transfer, attempting to access files from local filesystem.
(No debugging symbols found in ./test_kmod/src/a3kmod.ko)
Of course, we can also add source directory information. These are no different from user-space debugging.
Debugging with KGDB
The kernel provides a dedicated debugging tool: KGDB (Kernel GNU Debugger). We can compile the KGDB component into the kernel by enabling the CONFIG_KGDB=y configuration option during compilation, and use serial ports or other means for debugging.
In the QEMU emulation environment, we can specify a serial port (e.g., ttyS1) to provide output for KGDB. For example, consider the following boot script:
#!/bin/sh
qemu-system-x86_64 \
    -m 64M \
    -kernel ./bzImage \
    -initrd  ./rootfs.img \
    -append "root=/dev/ram rw console=ttyS0 kgdboc=ttyS1,115200 oops=panic panic=1 nokaslr" \
    -smp cores=2,threads=1 \
    -display none \
    -serial stdio \
    -serial tcp::4445,server,nowait \
    -cpu kvm64
- We added
console=ttyS0 kgdboc=ttyS1,to the kernel boot parameters, designating serial portttyS0as the console output and serial portttyS1as the KGDB debug port. - We added two
-serialparameters to the QEMU boot parameters, meaning two serial ports are created: the first is specified as standard input/output, and the second is specified as local port 4445.
We can trigger KGDB from inside the QEMU virtual machine by executing the echo g > /proc/sysrq-trigger command:
~ # cat /sys/module/kgdboc/par~ # cat /sys/module/kgdboc/parameters/kgdboc
ttyS1,115200
~ # echo g > /proc/sysrq-triggerameters/kgdboc
ttyS1,115200
~ # echo g > /proc/sysrq-trigger
[    9.078653] sysrq: DEBUG
[    9.081034] KGDB: Entering KGDB
Additionally, using the kgdbwait parameter in append can also make the kernel trigger automatically after boot completes.
Connect with gdb in another terminal.
gdb vmlinux
Reading symbols from vmlinux...
(gdb) target remote:4445
Remote debugging using :4445
warning: multi-threaded target stopped without sending a thread-id, using first non-exited thread
[Switching to Thread 4294967294]
kgdb_breakpoint () at kernel/debug/debug_core.c:1092
1092            wmb(); /* Sync point after breakpoint */
(gdb)
References
- https://arttnba3.cn/2021/02/21/OS-0X01-LINUX-KERNEL-PART-II/
- https://arttnba3.cn/2022/07/15/VIRTUALIZATION-0X00-QEMU-PART-I/
- https://www.ibm.com/developerworks/cn/linux/l-busybox/index.html
- https://qemu.readthedocs.io/en/latest/system/qemu-manpage.html
- http://blog.nsfocus.net/gdb-kgdb-debug-application/